Jupyter Notebooks
Before we proceed any further, we will begin using Jupyter Notebooks here which allows you to write and run Python code in an interactive environment. This is a great tool for learning Python and data science.
Here's how we get one up and runnning:
Note
We continue in our python-tutorial directory or whichever directory you have been using.
1. Set up a virtual environment
| Bash | |
|---|---|
You must activate the environment and install ipykernel — otherwise VSCode cannot list venv as a Jupyter kernel.
2. Create a Jupyter Notebook
In VSCode, to create a jupyter notebook, simply create a new file ending with .ipynb. For example, my_notebook.ipynb.
3. Open the Jupyter Notebook in VSCode
Open the .ipynb file in VSCode — it opens in the notebook editor.
4. Select the Python Interpreter
Click Select Kernel then Python Environments... then pick the venv interpreter (path ending in venv/bin/python on MacOS/Linux, venv\Scripts\python.exe on Windows). If it does not appear, run Python: Select Interpreter from the Command Palette (Cmd/Ctrl + Shift + P) first.
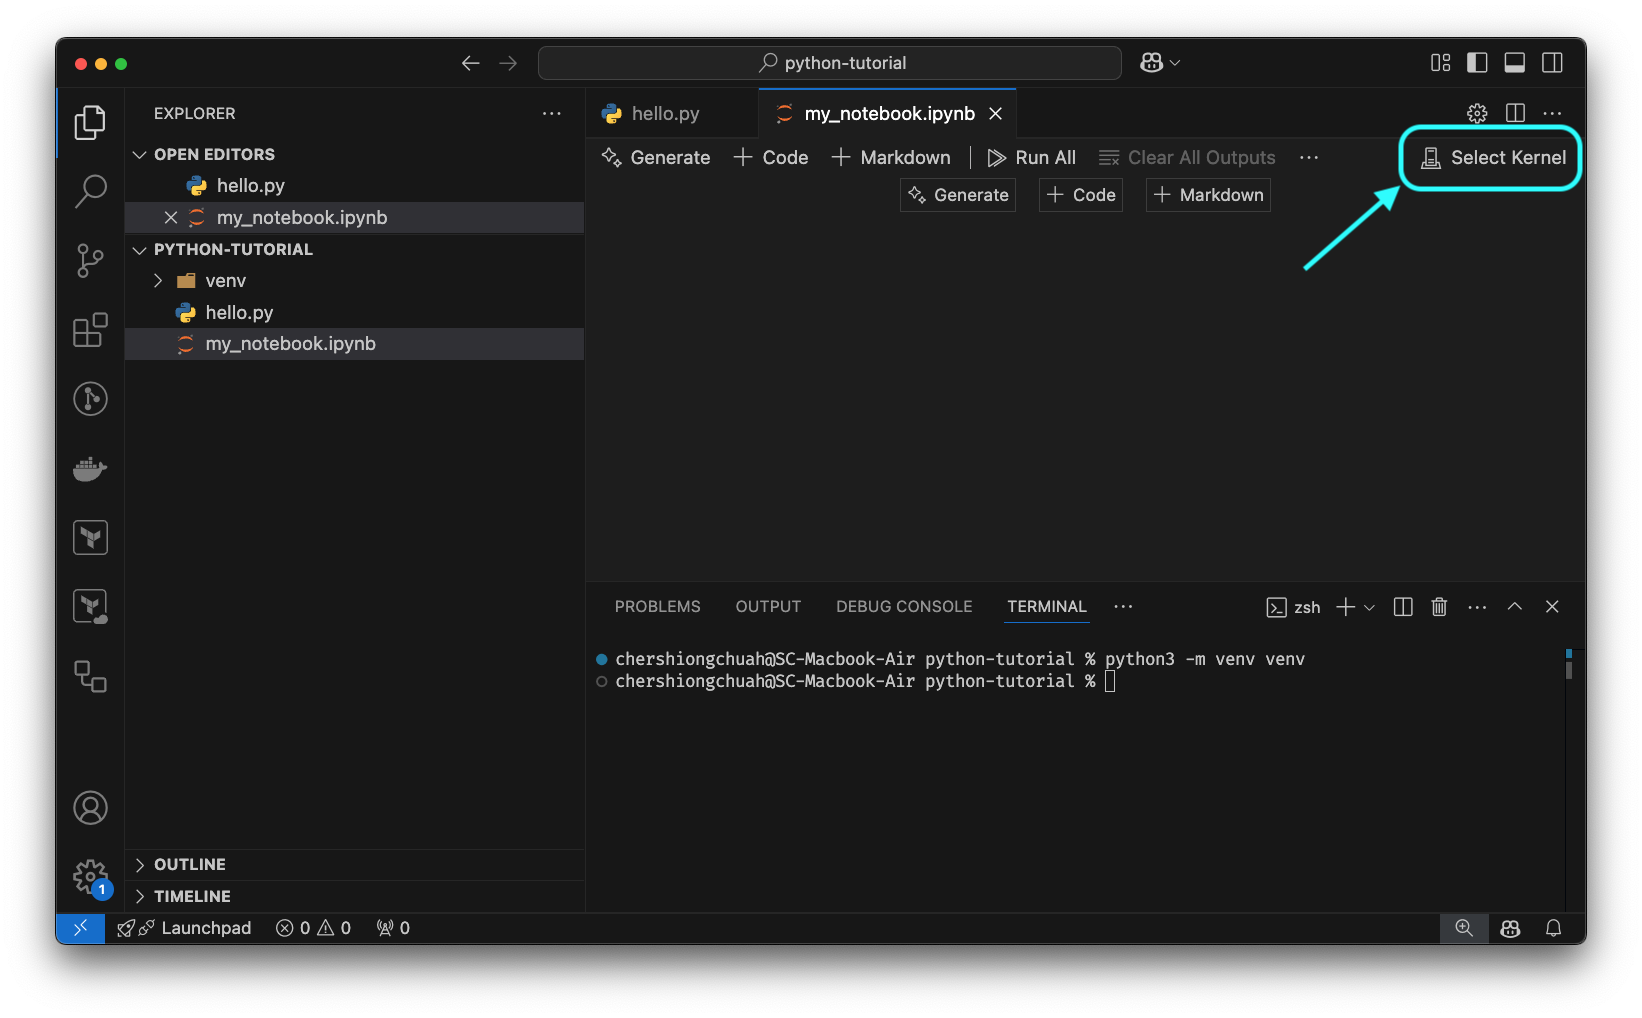
This is how you set which Python interpreter to use for the notebook.