Why bother setting up another server to manage your Nextflow pipeline?
Avoid premature termination of the pipeline. When you run a Nextflow pipeline from your local computer, your local computer is managing the tasks and communicating with Azure as jobs are completed. Depending on the complexity of your pipeline, this may be a long time (couple of days!). If your wi-fi router accidentally comes unplug or the connection is broken, the pipeline will terminate prematurely. While you could recover from this using
-resume, you can avoid the risks of disconnection by using a cloud server, which is designed to run 24/7, to orchestrate this.Location independence. You can start a pipeline from home (wfh being the consequence of covid) and perhaps go elsewhere and check in later.
Free up your local computer for other things. You do not have to keep your local computer running Nextflow constantly - just start the pipeline in the cloud and continue on with your usual day.
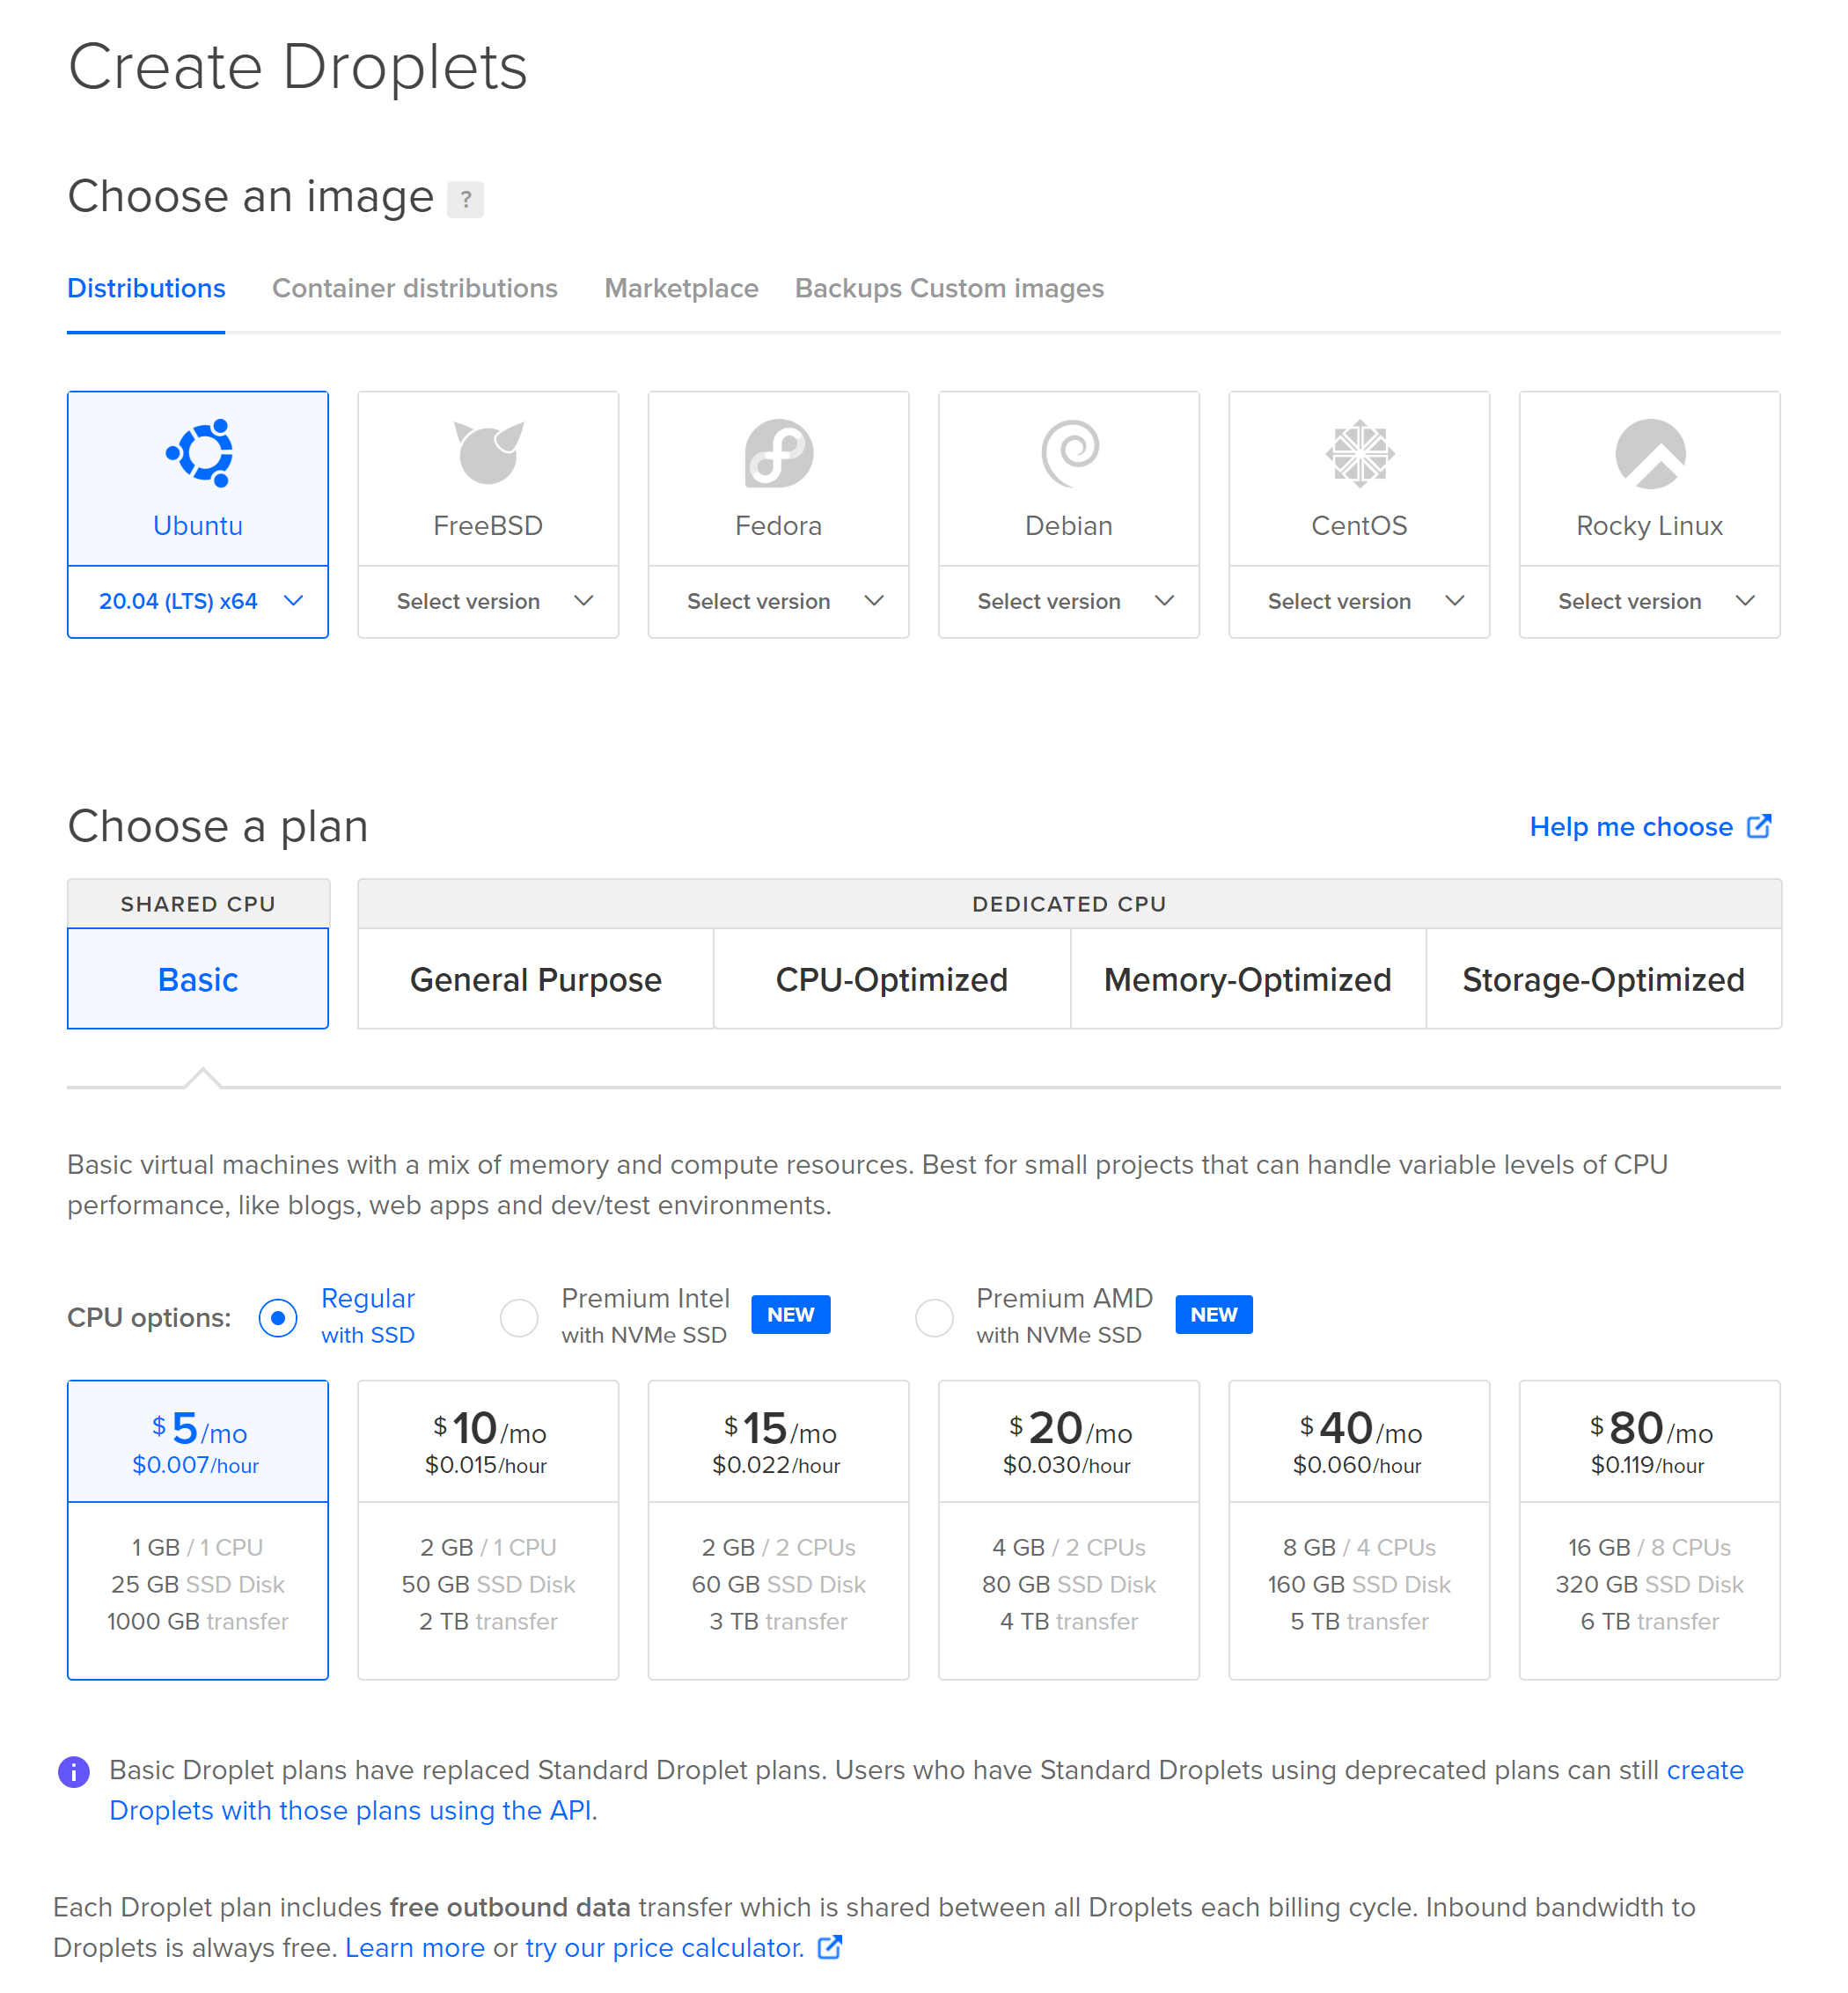
1. Obtaining a cloud server
Plenty of hosting providers provide you with access to a VPS (Virtual Private Server) running Ubuntu 20.04. My recommendation is DigitalOcean - fantastic documentation, much cheaper compared to AWS/Azure/GCP, good performance and reliability in my experience. The $5/month server is what I personally use and is more than capable of handling Nextflow.
Setting up an Ubuntu server on DigitalOcean
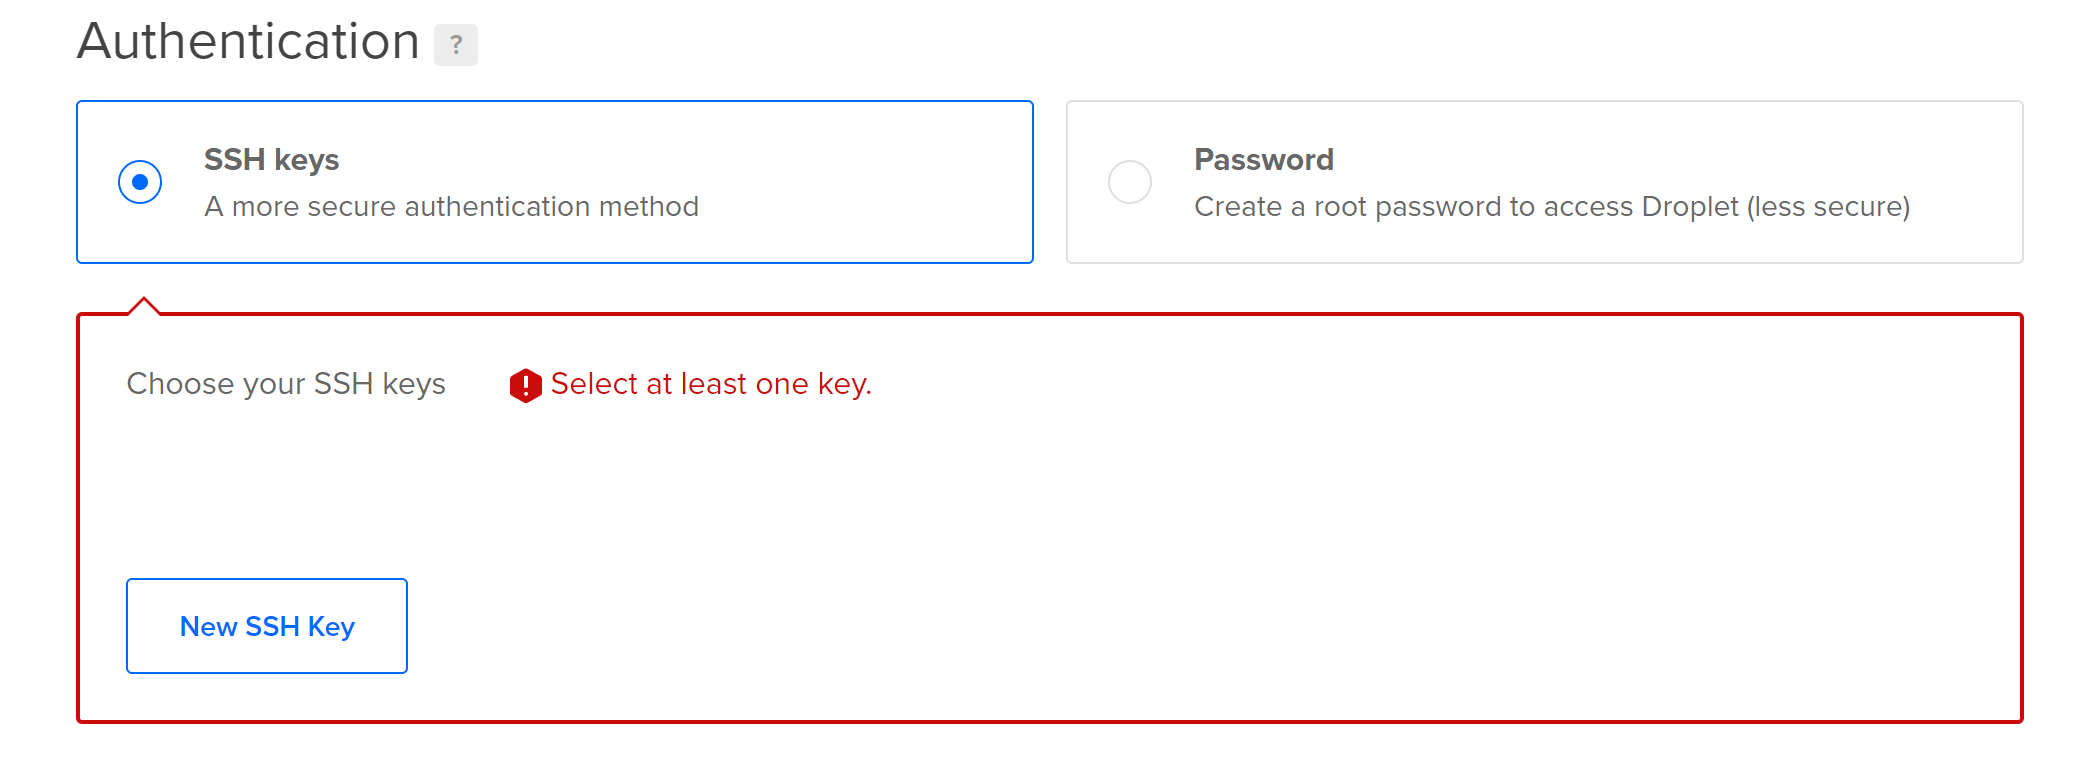
Server authentication
For authentication, select SSH key to access your server from the terminal (mac/linux) or using PuTTY (windows):
2. Logging in to the server
Once your server is set up, log in to it.
Mac/Linux:
ssh -i <private_key.pem> root@<server_ip>
For Windows I suggest using the PuTTy client. Depending on your choice of VPS and platform, you may wish to consult this guide: https://www.digitalocean.com/community/tutorials/how-to-set-up-ssh-keys-on-ubuntu-20-04
3. Installation
Install Java and screen first.
sudo apt update
sudo apt install default-jre screen
We will install Nextflow in /nextflow. You can change this location if you wish.
cd /nextflow
curl -s https://get.nextflow.io | bash
We then need to add this directory to PATH. Doing this allows you to type nextflow directly into the terminal. Open .bashrc file to begin.
nano ~/.bashrc
Add the bottom, add the following line:
export PATH=“/nextflow:$PATH”

# this line is optional
export NXF_DEFAULT_DSL=1
# I am using DSL1 as per the docs when I was setting up my pipeline.
# If you are using DSL1 you will need to add this to .bashrc.
Save and exit with Ctrl+X and yes. Next, we need to source the file.
source ~/.bashrc
4. Check Nextflow works
If everything is installed correctly, typing nextflow into the terminal should show the program help screen.
nextflow
5. Clone and run the pipeline
Now it’s time to bring in your pipeline using the power of git.
cd ~
git clone <your_nextflow_pipeline_repository>
For example, I would put in
git clone https://github.com/shaunchuah/cfdna_nextflow/
and this will bring in my pipeline at ~/cfdna_nextflow.
For my pipeline I would need to clone sample_credentials.json to credentials.json and fill it in with my Azure credentials.
cd ~/cfdna_nextflow
cp sample_credentials.json credentials.json
nano credentials.json
Now you can launch the pipeline!
nextflow pipeline.nf -resume -profile test
Now your cloud server is orchestrating the cloud cluster! But let’s take this one step further…
6. Use screen to launch long-running pipelines
Reference: https://www.howtogeek.com/662422/how-to-use-linuxs-screen-command/
Here’s what I do when launching pipelines that may take days to weeks to complete. Create a screen session:
screen
If this is the first time, there will be some text. Hit enter and it all disappears but you are now in a screen session. Try any command - eg. nextflow.
To detach from the screen session, hit Ctrl+A and D.
To list all screen sessions type screen -ls.
To reattach to the screen session type screen -r.
I launch my pipelines from within screen and hit Ctrl+A and D to detach. Now I can safely close my SSH connection to the server and the pipeline will remain running. Reconnect to the server and type screen -r and you will see that the pipeline remains running. This nifty trick will help avoid pipelines terminating because of flaky connections and give you true mobility to perform bioinformatics from anywhere with an internet connection.
It also means that in 2022, you no longer need powerful desktop computers to run bioinformatics anymore. All you need is a credit card and you can access vast computing power way beyond any single machine is capable of.
I hope you’ve found this series helpful. If this has helped you please let me know on Twitter!
Bonus: If you want to take this even further, you could have a powerful cloud server to develop on using VSCode Remote Containers. Check out GitHub Codespaces as an example of this.